
Set up automatic cancellation of overdue unpaid orders
Published:2026-08-07 16:20/Updated:2026-08-07 16:26
Automatically cancel orders that stay unpaid beyond a number of days, at a fixed time each day. Setup through activation.
Unpaid order auto cancel is a workflow that cancels orders that are processing, unpaid and unfulfilled beyond a chosen number of days since creation. It runs once a day at a fixed time and cancels matching orders in SHOPLINE, optionally emailing the buyer.
Note
Workflows are available on the Pro plan only and are not shown on the basic plan.
| Item | Content |
|---|---|
| Trigger | Once a day at the configured time (default timezone: Asia/Tokyo) |
| Target | Orders that are processing, unpaid and unfulfilled, older than the threshold (default 3 days) |
| Action | Calls the SHOPLINE order cancellation API, optionally emailing the buyer |
Prerequisites
- At least one SHOPLINE connection
- [Workflows] visible in the left navigation
1. Open the workflows screen
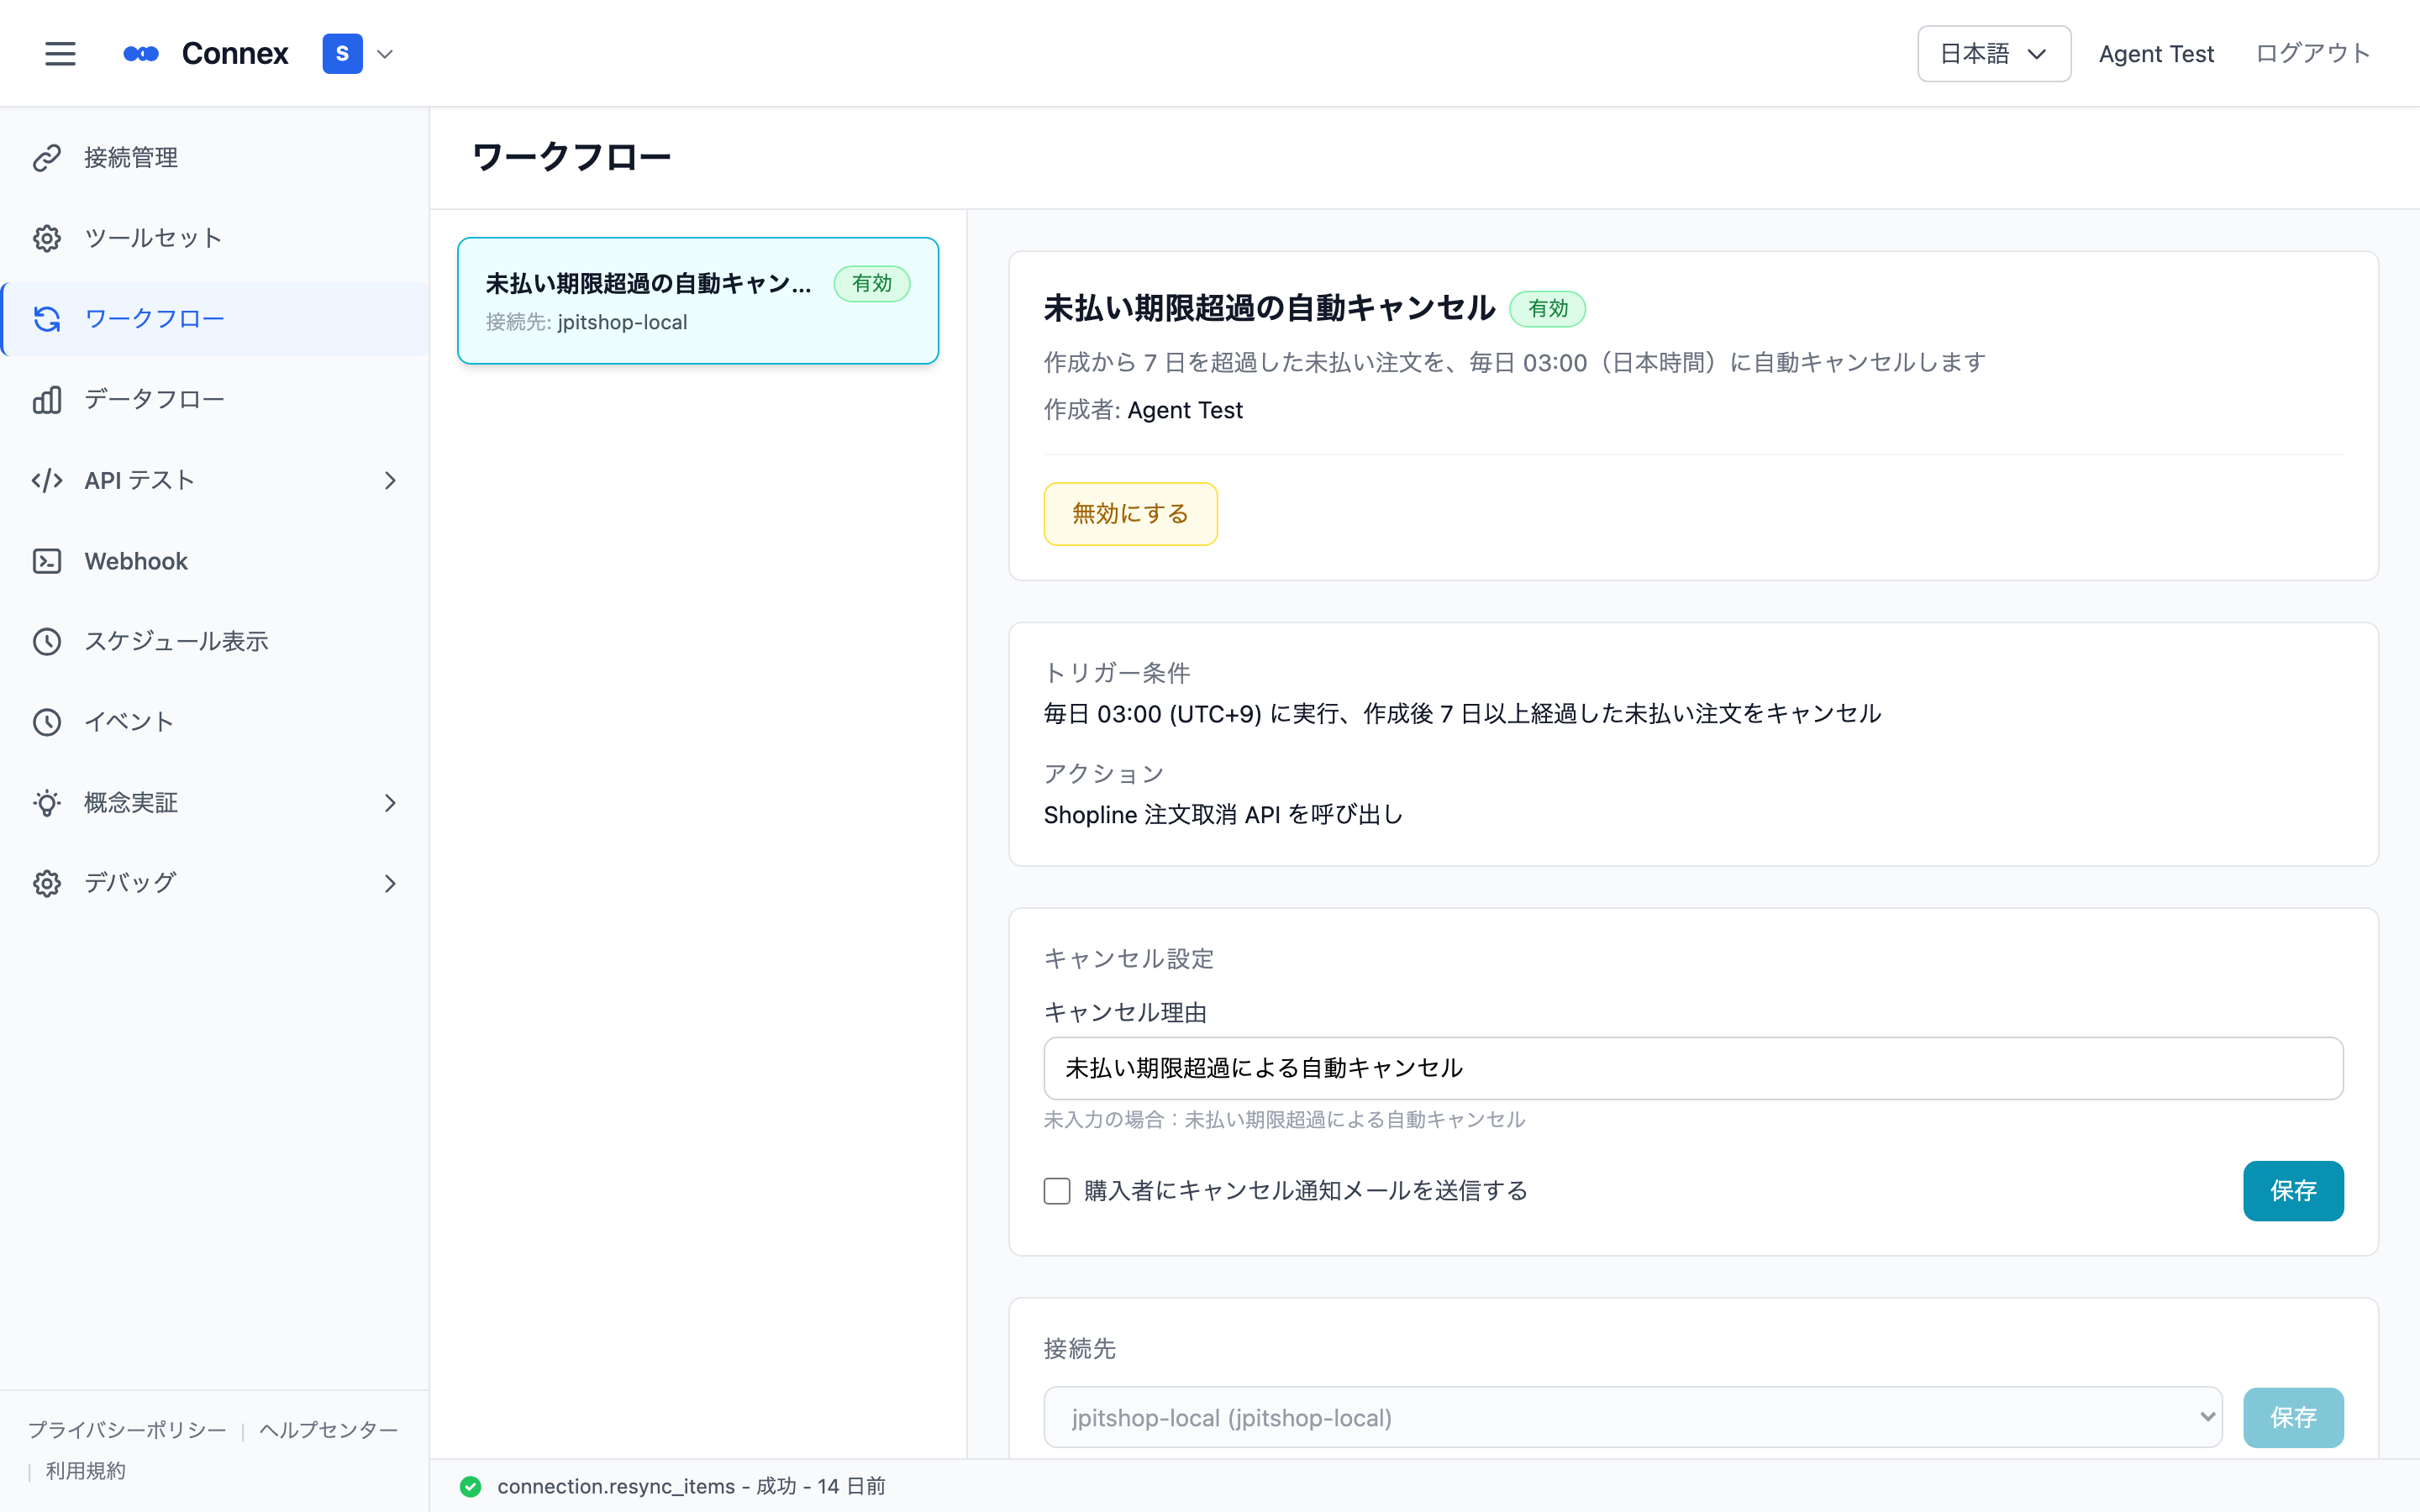
Click [Workflows] in the left navigation and select Unpaid Order Auto Cancel in the list. The detail panel opens on the right with the status at the top (not configured / enabled / disabled / error).
2. Choose the connection (store)
- In the connection section of the detail panel, pick the target SHOPLINE store.
- Click [Save]. A confirmation message means it is set.
Caution
The connection can only be changed while the workflow is disabled. If it is enabled, a message asks you to disable it first.
3. Review the trigger conditions
The trigger section describes the run time, timezone and day threshold in words (for example: runs daily at the given time and cancels unpaid orders older than the given number of days).
The action section describes what will happen (calling the SHOPLINE cancellation API, and whether the buyer is notified).
4. Set the reason and customer notification
- In the cancellation settings section:
- Reason: free text. A default explaining the automatic cancellation is used when left empty
- Email the buyer: tick to send a cancellation notice
- Click [Save].
5. Enable it
- Once a connection is set, [Enable] appears at the top of the detail panel.
- A dialog confirms that it will then run automatically on schedule.
- The status becomes enabled and it runs daily from then on.
Other actions
- Disable: [Disable] stops automatic runs. Disable first if you want to change the connection or the settings.
- Run now: [Run Now] appears while enabled and runs once immediately without waiting for the schedule.
- History: past runs are listed newest first at the bottom of the detail panel, each with a status (succeeded / partly succeeded / failed / running / queued), the time, and the trigger type (schedule / manual / webhook).
Warning
Automatic cancellation cannot be undone. Check the threshold, the target conditions and the notification setting carefully before enabling. We recommend running it manually once first to see what it would affect.
Was this article helpful?